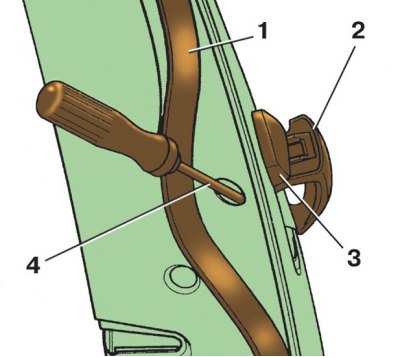
Removing the spacer

1 - sealant; 2 – the external handle of a door; 3 - spacer; 4 - socket wrench
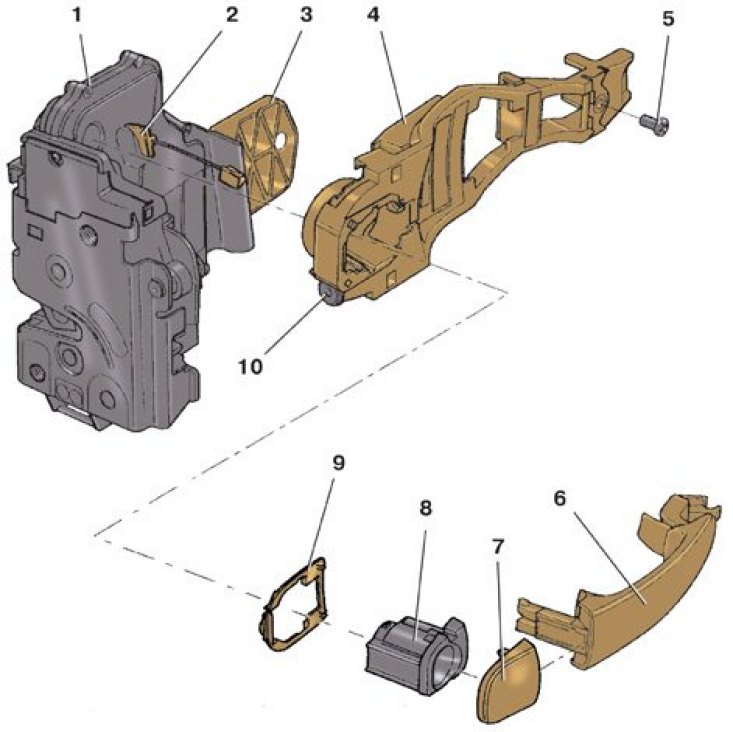
Rear door lock details

1 - lock; 2 – draft of the external handle; 3 - bracket; 4 - holder; 5 – holder fastening screw; 6 - outer handle; 7 - lining of the spacer; 8 - spacer; 9 - spacer gasket; 10 – a bolt of fastening of a spacer
1. Open the door and peel off the seal 1 (see fig. Removing the spacer) doors opposite the outside handle 2 doors.
2. Pull the outer handle 2 of the door and, holding it in this position, unscrew the spacer fastening bolt with a socket wrench 4 by 2-3 turns. Then pull spacer 3 towards you.
Attention! Loosen the bolt just enough to remove the spacer. Otherwise, the spacer retainer will fall inside the door.
3. Press the handle 1 (see fig. Removing the outer door handle) to the door panel and disconnect the tip 2 of the rod from the handle 1.
4. Pull out handle 6 (see fig. Rear door lock details) out of the door by disengaging the hook in the front of the handle from the holder 4.
5. Insert the hook on the front of the handle into the holder 4 and insert the handle 6 into place.
6. Press the handle 1 (see fig. Removing the outer door handle) to the door panel and connect the rod tip 2 to it.
7. Check the operation of the lock. If the handle does not return to its original position, then the end of the return spring 4 (see fig. Connecting the Spring to the Outer Handle Lever) jumped out of the lever 3. To connect the spring to the lever, insert the hook 1 into the hole for the spacer, hook the end of the spring 4 with it and insert it into the hook of the lever 3.
8. Replace the spacer and glue the seal.
