Diesel engine fuel tank parts
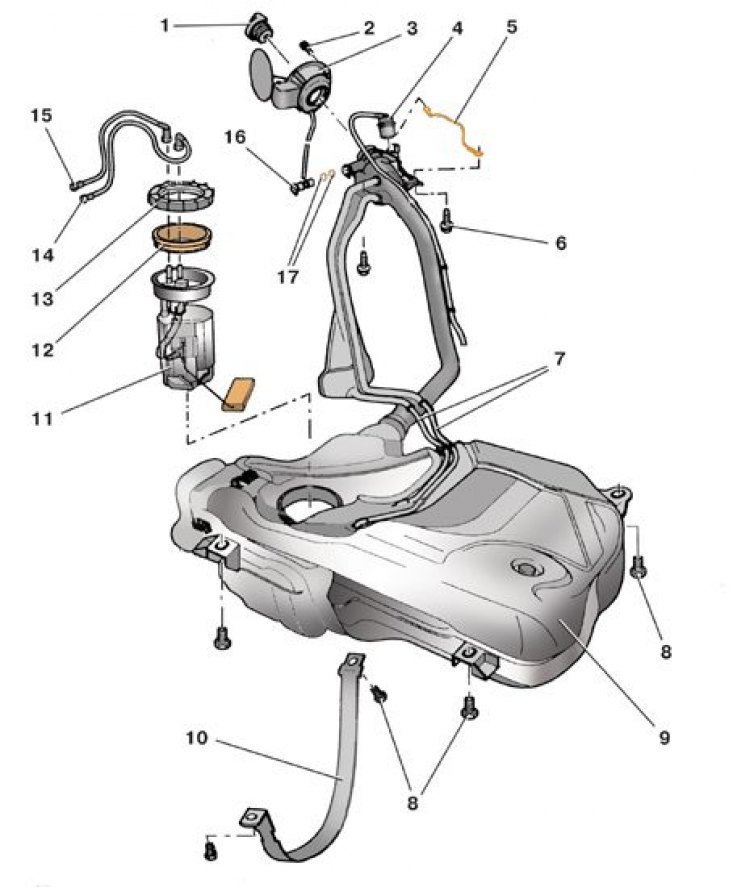
1 - filler cap; 2 - bolt; 3 - filler neck; 4 - gravity valve; 5 - wire to «mass»; 6 - bolts for fastening the filling pipe; 7 - tank ventilation tubes; 8 – a bolt of fastening of a tank; 9 – fuel tank; 10 – a collar of a fuel tank; 11 - fuel receiver; 12 - sealing ring; 13 - nut; 14 - fuel supply line; 15 - fuel return fuel drain line; 16 - air valve; 17 - sealing rings
Removal and installation are shown on the example of a car with a diesel engine; on cars with gasoline engines, the fuel tank is removed and installed in the same way.
Details of the fuel tank of a car with a diesel engine are shown in fig. Details of the fuel tank of a car with a diesel engine, models with gasoline engines - in fig. Details of the power supply system of the carburetor engine.
1. Disconnect the wire from the terminal «-» battery.
2. Disconnect the block with wires and fuel lines from the fuel receiver (see subsection 4.3).
3. Drain the fuel from the tank using a fuel suction device.
4. Remove rear suspension (see subsection 7.3.7).
5. Remove the main and additional mufflers (see subsection 6.4).
6. Remove the heat shield to the left of the fuel tank.
7. Remove the right rear wing latch.
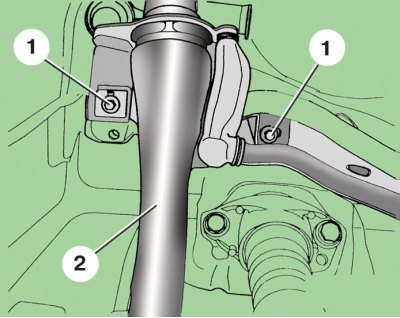
8. Unscrew the bolts 1 fastening the filling pipe 2.
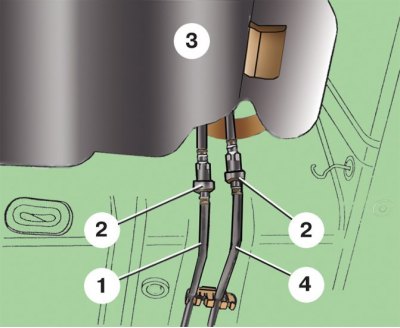
9. Disconnect the fuel supply lines 1 and fuel drain 4 by pressing the locking buttons 2 (3 - fuel tank).
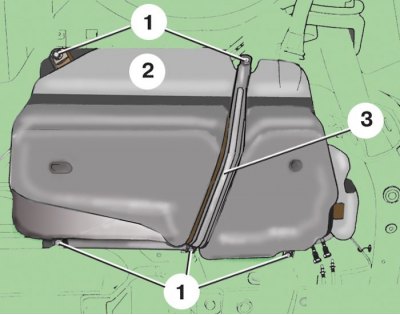
10. Place a suitable support under the fuel tank and unscrew the bolts 1 securing the fuel tank 2 (3 - collar).
11. Pull the filler pipe out of the mudguard of the filler neck 3 (see fig. Diesel engine fuel tank parts) and lower the fuel tank down.
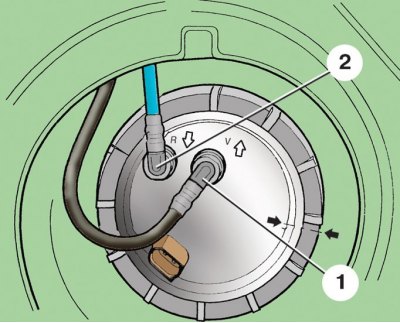
12. Install the fuel tank in reverse order. Connect the fuel lines as shown in the figure (1 - fuel supply line (black color); 2 - fuel return hose (of blue color)).
Tightening torques, Nm
| Bolt of fastening of a fuel tank | 25 |
| Bolt of fastening of a collar of a fuel tank | 25 |
| Bolt of fastening of a bulk mouth | 1,5 |
| Adsorber mounting bolt | 10 |
| Bolt of fastening of a bulk pipe | 10 |
