Removal and installation of a mirror element
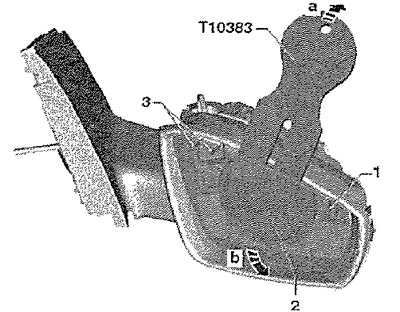
Protect the edges of the housing from damage, tape over, e.g. textile adhesive tape. Tilt mirror glass -1- to maximum position. Press out mirror glass -1- e.g. using a wide plastic wedge from the holder -2- and the housing -arrow a-.
Installation
Push the mirror element in the center onto the bracket in the housing. The mirror element should click into place with an audible click. Then perform a sanity check.
Removal and installation of the adjustment electric drive
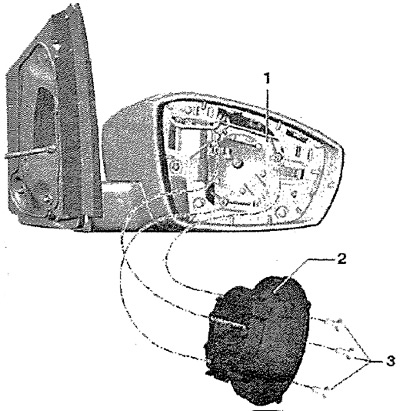
Remove mirror element. Release screws -3-. Swing adjusting unit with motor -2- to one side and unplug connector.
Installation
Installation in reverse order. Screw tightening torque (pos. 3): 2 Nm. Before mounting the mirror glass, check the function.
Removal and installation of the case of an external rear-view mirror
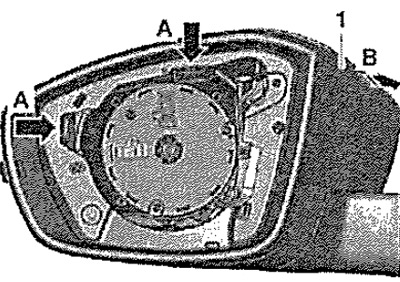
Remove mirror element. Unlock latches -arrow a-. Detach mirror housing -1 -in -arrow B-.
Installation
Position mirror housing -1- and press it in -arrow B- into catches -arrows A-. The latches lock with an audible click. Then perform a sanity check.
Removal and installation of an overlay
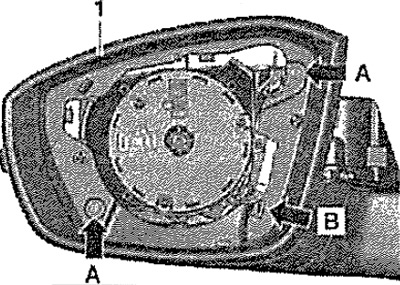
Remove mirror element. Remove mirror housing. Release screws -A-. Unlock latches -B-. Remove trim -1-.
Installation
Installation in reverse order. Then perform a sanity check.
Removal and installation of an adjusting element
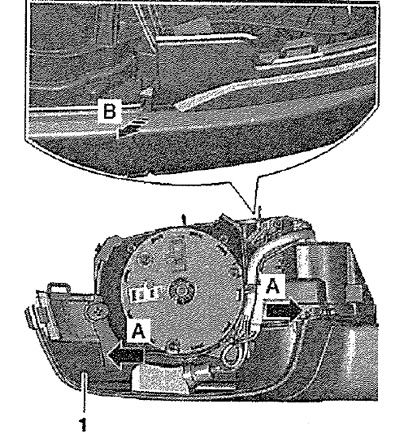
Remove mirror element. Remove mirror housing. Unlock latches -arrow a-. Pull assembly part -1- off mirror bracket in -arrow B-.
Installation
Installation in reverse order. Then perform a sanity check.
Removal and installation of an external rear-view mirror (with electric drive)
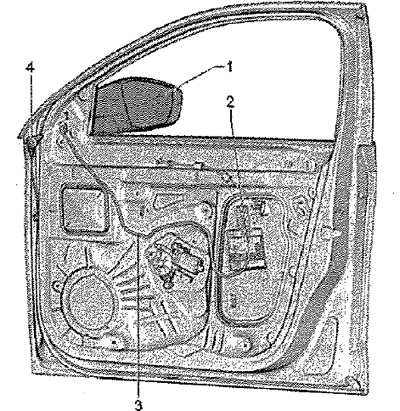
Remove front door trim. Disconnect connector -2- of wire -3- of exterior mirror -1-. Remove screw -4-.
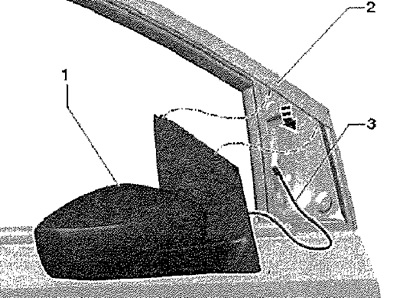
Pull exterior mirror -1- slightly away from door below and out of glass guide -2- -arrow-. Pull wire -3- through hole in door.
Installation
Pull the wire -3- through the hole in the door. Insert exterior mirror -1- into guide -2-. Screw screw -4- into mirror housing -1-. Tightening torque: 12 Nm. Grab wire -3-. Connect connector -2-. Before installing the door trim, check the function.
