For vehicles with manual gearbox
Clean input shaft splines, and if clutch disc has already been used clean hub splines, remove any traces of existing corrosion and lubricate input shaft splines with a very thin layer of grease -G 000 100-. Then move the clutch disc on the input shaft in one direction and the other until the hub moves freely along the shaft. Be sure to remove excess grease. Check clutch disc alignment. Check clutch release bearing for wear. Replace release bearing if worn.
For vehicles with automatic transmission
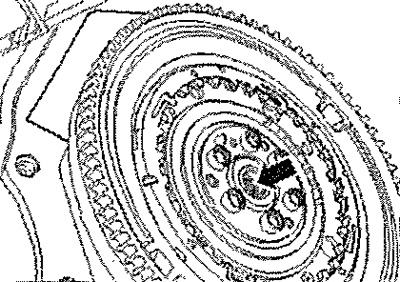
Replace needle bearing -arrow- in crankshaft. Install the gear selection cable to the gearbox.

All
Install CP. Install gearbox support. Fix the power unit on the bracket T10497. Place power unit with bracket -T10497- on engine and gearbox jack -VAG 1383 A-.
Instruction. Replace the screws that are tightened with additional turning to the specified angle. Replace self-locking nuts and screws, as well as O-rings and gaskets. Fix all hose connections with clamps corresponding to those installed at the factory. During assembly, install all cable ties in their original places.
Insert the power unit into the body. Screw in bolts -arrows- for engine support by hand, but do not tighten. First screw in bolts -arrows- for gearbox support by hand until they are in contact with the bearing surface.
Note: The screws are tightened when adjusting the subframe.
Disconnect bracket T10497 from engine. Install starter. Install coolant bleeder pump -V51- after engine is switched off. Install air duct. Install guide screen.
For vehicles with manual gearbox
Install the clutch slave cylinder. Install cables with cable supports.
For vehicles with automatic transmission
Install the subframe. Install the selector cable, disconnect the connector of the mechatronic unit and install all brackets on the gearbox.
All
Install the neutralizer. Install drive shafts. Install the control arm, ball joint and stabilizer link. Install the air conditioner compressor. Install poly V-belt. Electrical connectors and cabling. Install engine control unit -J623-. Connect coolant hoses with quick coupling. Install the power unit lower support. Install fender. Install front wheels. Powertrain mount adjustment. Install the battery bracket. Install the air filter housing.
Carefully! If the supply voltage is too high, the control units may fail. Do not use the charger to start the engine!
Fill and bleed the cooling system, Interrogate the event recorders of all units and erase the errors resulting from the removal and installation of the engine. After erasing the errors in the event memory of the engine control unit, regenerate the readiness code.
Note: Drained coolant may only be reused if the cylinder block or cylinder head is not replaced. Contaminated coolant must not be used.
