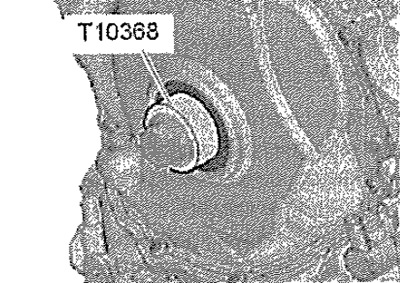
Carefully! In order not to damage the ring gear, only screw in the crankshaft V-ribbed belt pulley bolt using the tool -T10368-.
Screw in screw securing poly V-belt pulley to crankshaft using drift -T10368-.
Attention! Risk of engine damage. It is forbidden to turn the crankshaft from the "TDC" position" with the pulley removed, this can lead to a change in valve timing.
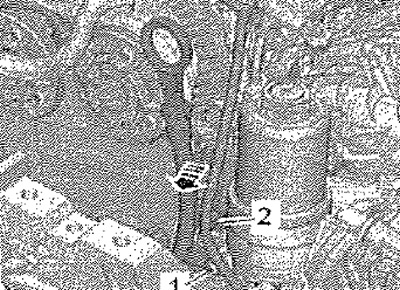
Release retainer -arrow- of wiring harness. Remove screw -1-. Unclip guide tube for oil dipstick from mount on upper timing chain cover -arrow-. Remove the dipstick guide tube from the upper timing chain case.
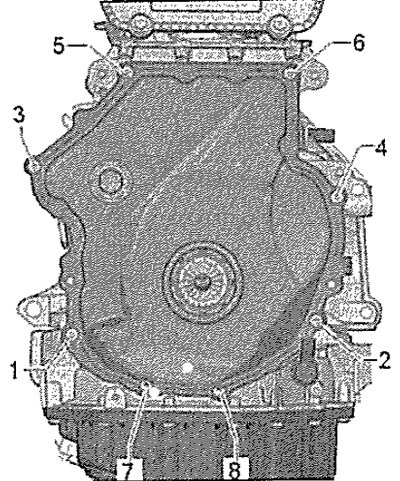
Cover with 8 screws
Remove screws -1...8-.
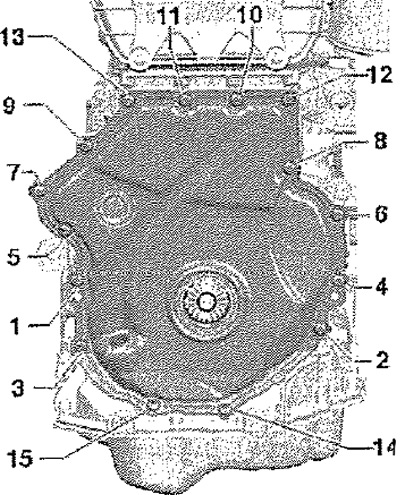
Cover with 15 screws
Remove screws -1...15-.
All
Using a sharp flat trowel, cut through the sealant at accessible points around the lower timing chain case. Using a spatula, carefully release the lower timing chain cover in several steps so as not to deform it.
Installation
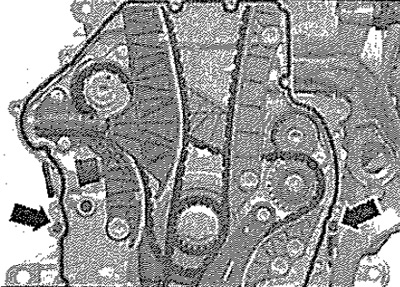
Note: Silicone sealant. Pay attention to the expiration date of the silicone sealant. The lower timing chain case must be installed within 5 minutes of applying the silicone sealant. Replace bolts and screws tightened with additional turn to the specified angle. Replace O-rings, gaskets and self-locking nuts. Remove any sealant residue from the mating surfaces on the cylinder block, top of the oil pan, and bottom timing chain case with a chemical sealant thinner. Degrease bonded surfaces. Check that both pins -arrows- for centering the lower timing chain cover are present.
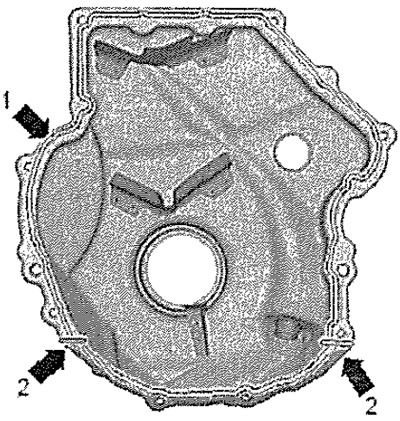
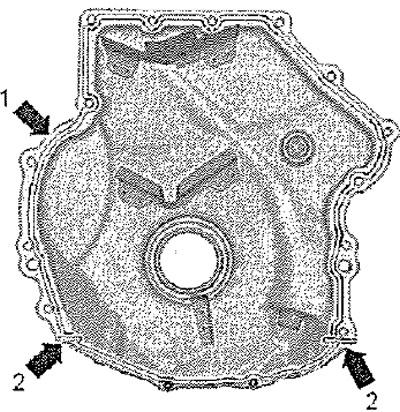
Cut off the tip of the sealant tube on the front mark (hole diameter about 3mm). Apply silicone sealant to the clean mating surfaces of the lower timing chain cover -arrow 1- and to the surfaces -arrow 2- as shown.
Cover with 8 screws
- Sealant bead thickness: 2...3 mm.
Cover with 15 screws
- Sealant strip thickness: 2...3 mm.
Note: The lower timing chain cover must be installed within 5 minutes after applying the silicone sealant. The sealant strip should not be wider than prescribed, because otherwise, excess sealant will enter the oil sump and clog the strainer in the oil intake pipe.
Tightening procedure for lower timing chain case with 8 screws
Tighten screws -1 to 8- in 2 steps in the sequence shown.
1. Tighten the screws to 8 Nm.
2. 45° (tighten 1/8 turn.).
Tightening procedure for lower timing chain cover with 15 screws
Tighten screws -1 to 15- in 2 stages in the sequence shown.
1. Tighten the screws to 8 Nm.
2. 45° (tighten 1/8 turn.).
Note: After installing the lower timing chain cover, allow the sealant to dry for approx. 30 minutes. Only after that you can fill in engine oil.
Installation in reverse order. Install the poly V-belt tensioner. Adjust power unit mounts. Fill with engine oil.
