Removal and installation of the panel of facing of a back wall of a luggage compartment
Removing
1. Remove the floor covering in the luggage compartment.
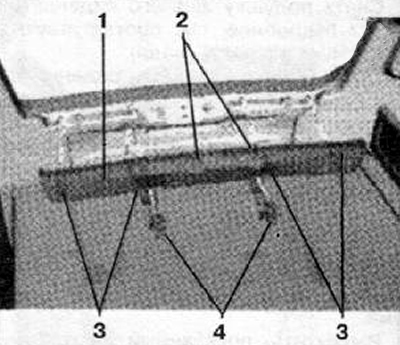
2. Remove rivet-type retainers (4), shown in the figure below.
3. Do not remove the fixing screw covers (2), shown in the figure below. The screws are required to attach the tailgate lock brackets.
4. Disconnect the fixing clips (3), shown in the figure below.
5. Remove the panel lining the rear wall of the luggage compartment (1), by moving it upwards, disengaging it from the latches.
Installation
Installation is carried out in the reverse order of removal.

Removal and installation of the upper part of the side panel facing the luggage compartment
Removing
1. Remove the luggage compartment floor covering.
2. Remove the upper part of the C-pillar trim panel assembly (for details, see the relevant section in this chapter).
3. To remove the panel of facing of a wheel arch in salon.
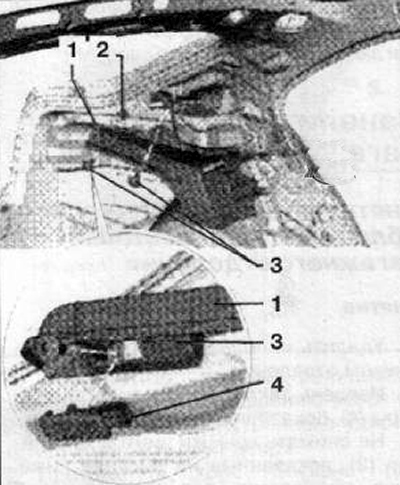
4. Remove the luggage compartment lamp (4), shown in the figure below
5. Unscrew the fastening screws (3), shown in the figure below.
6. Disconnect the facing panel from the supports and remove from the body panel.
7. Pull the seat belt through the hole in the trim panel.
Installation
Installation is carried out in the reverse order of removal.

Removal and installation of the side panel of facing of a luggage space
Removing
1. Remove luggage compartment rear wall trim panel (for details, see the relevant section in this chapter).
2. Remove the rear seat cushion assembly (for details, see the relevant section in this chapter).
3. Remove the rear seat back assembly (for details, see the relevant section in this chapter).
4. Remove the upper part of the side panel lining the luggage compartment (for details, see the relevant section in this chapter).
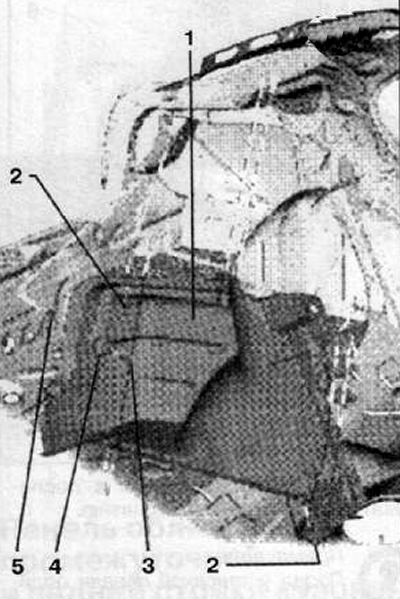
5. Disconnect the fixing clips (2) from luggage compartment trim panel (1), as shown in the figure below.
6. Unscrew the screw shown in the figure below (3) mounting hooks (4). Mounting screw tightening torque for installation 1.2 Nm.
7. Detach trim panel (1), moving it towards the front of the passenger compartment, away from the clamps on the seatback frame, as shown in the illustration below.
8. Detach the cladding panel (1), moving it inward - away from the support.
9. Remove trim panel assembly (1) from the luggage compartment.
10. Install expansion nut (5) mount shown in the figure below.
Installation
Installation is carried out in the reverse order of removal.
Note. Before installing the cladding panel, it is necessary to check all fastening elements and, if necessary, replace these elements with new ones.

Removal and installation of the side panel of facing of a luggage space (Spaceback)
Removing
1. Remove the rear seat cushion assembly (for details, see the relevant section in this chapter).
2. Remove the rear seat back assembly (for details, see the relevant section in this chapter).
3. Remove the lining of the rear wall of the luggage compartment (for details, see the relevant section in this chapter).
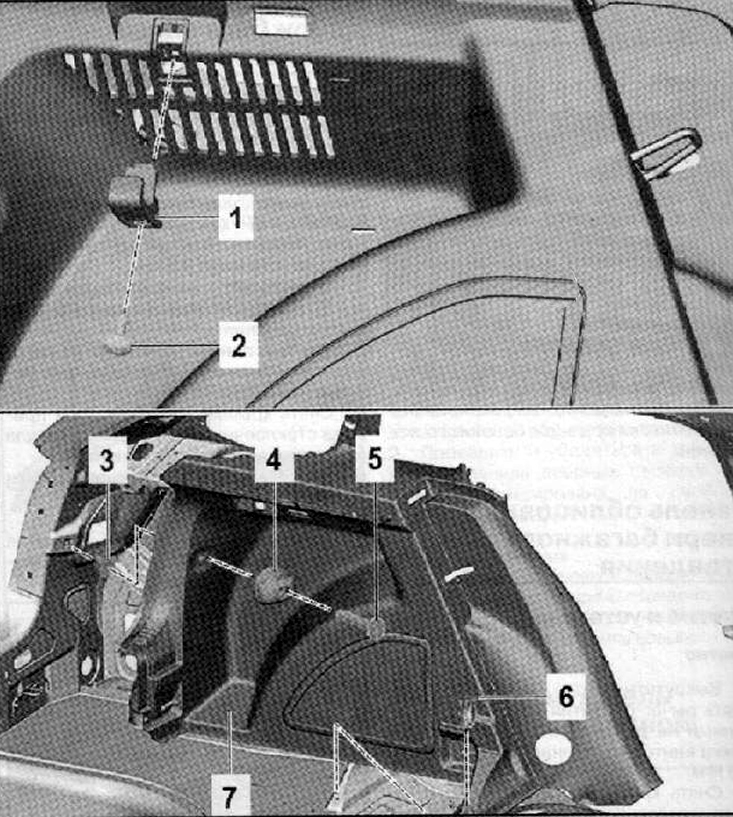
4. Remove the fastening clip (6), shown in the figure below.
5. Remove fixing hooks (4) And (1), as shown in the figure below.
6. Detach the cladding panel assembly from the retaining clips.
7. Disconnect the harness connector from the luggage compartment light and from the 12V outlet (if the car is equipped).
8. Pull the rear seat belt through the trim panel.
9. To remove the facing panel and to take from salon.
Installation
Installation is carried out in the reverse order of removal.

1. Fixing hooks
2. Mounting screw, installation torque 2.5 Nm
3. Adjusting nut
4. Fixing hooks
5. Mounting screw, installation torque 1.2 Nm
6. Clamp
7. Side panel lining luggage compartment
