Removing
1. Remove front bumper assembly (for details, see the relevant section in chapter Body).
2. Drain the coolant into a prepared container (more, see relevant section in this chapter).
3. Remove the fan shroud assembly with the cooling fan (more, see relevant section in this chapter).
4. Disconnect the wiring harness connector from the cooling fan thermal switch.
5. Disconnect the upper water pipe from the radiator.
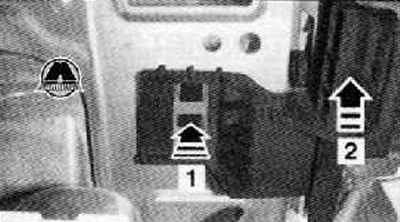
6. Remove the windshield washer reservoir bracket. To do this, click in the direction of the arrow (1) and at the same time pull in the direction of the arrow (2) up and remove the bracket assembly as shown in the figure below.
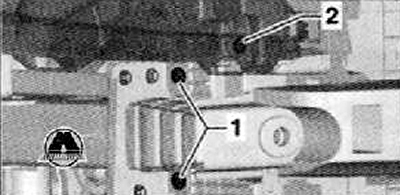
7. Unscrew the fastening screw (2) radiator support assy (at both sides), as shown in the figure below.
8. Push the radiator towards the rear of the vehicle to disengage the radiator from the supports on the right and left sides.
Vehicles without air conditioning
9. Pull the radiator of the cooling system together with the radiator of the intercooler of the turbocharging system up to disconnect from the supports, and then remove it from the engine compartment through its lower part.
Vehicles with air conditioning
10. Remove attachment drive belt (for details, see the relevant section in chapter Diesel engine).
Attention. Do not disconnect the system pipes from the air conditioning compressor.
11. Unscrew the mounting bolts and disconnect the air conditioning compressor from the mounting bracket. Hang the compressor from a suitable item in the engine compartment using a piece of wire.
12. Mark the mounting position of the fixing screws (1) on the right and left sides, then just loosen the fastening screws.
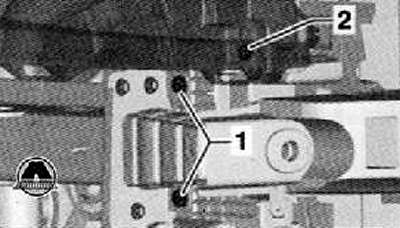
13. Pull the radiator together with the intercooler of the intake system and the condenser upwards to disconnect from the rubber supports.
14. Move the radiator assembly with the condenser back.
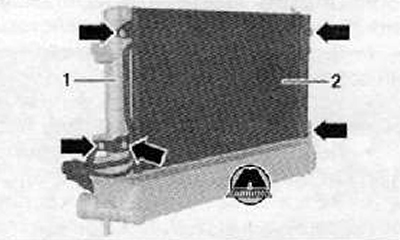
15. Unscrew the fastening screws (arrows) capacitor (2) to the cooling system radiator (1), as shown in the figure below.
16. Move the capacitor forward and connect to the fastening element.
17. Remove the radiator of the cooling system together with the radiator for intercooling the air downwards.
Disconnecting the charge air intercooler radiator from the cooling system radiator
Attention. To prevent damage to the aftercooler radiator, the assistance of a second mechanic is required during the respective operation.
18. Insert a screwdriver into the left grip of the intercooler radiator from the back of the radiator as shown in the figure below. Then, turning the screwdriver, squeeze the grip of the radiator (1) cooler as shown in the figure below.
19. Pull down the left side of the intercooler radiator to disconnect it from the radiator of the cooling system, as shown in the figure below.
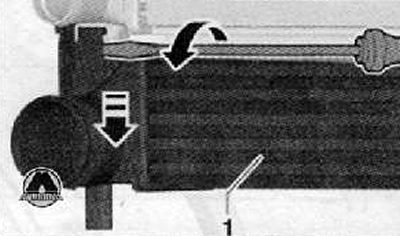
20. Press on the intercooler radiator (1), to disconnect it from the radiator on the right side (2), as shown in the figure below.

Installation
Installation is carried out in the reverse order of removal.
Fill the cooling system with fresh coolant (more, see relevant section in this chapter).
