Removing
1. Unscrew the fastening screws shown in the figure below (arrows), air intake (1). Disconnect the air duct (2) air filter housing as shown in the figure below.

2. Remove the soundproofing cover.
3. Disconnect the right and left air outlets.
4. Disconnect the wiring harness connector shown in the figure above from the cooling fan (position 17).
5. Using a suitable tool, remove the fan shroud from the retainers on the right and left sides of the heatsink as shown in the figure below.

6. Pull the fan casing assembly with the fan upwards, disconnecting from the supports, and then remove the casing from the engine compartment downwards.
Disconnecting the electric fan from the casing
7. Disconnect the cooling fan wiring harness connector from the holder
8. Press on the fixing clips (arrows), shown in the figure below.

9. Carefully pry off the fan spacer on the back of the shroud using a suitable tool as shown in the figure below.
10. Remove the fan ring.

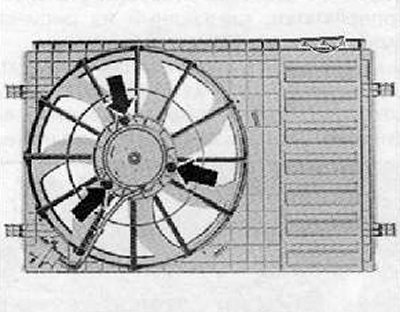
11. Unscrew the fastening nuts (arrows) and disconnect the cooling fan from the casing, as shown in the figure below.

Installation
Installation is carried out in the reverse order of removal.
The fan shroud must be installed through the bottom of the engine compartment, installing it in all four supports on the radiator of the cooling system. The fan casing should be fixed in the supports with characteristic clicks.
Check and make sure that the fan shroud is properly engaged in all latches.
