General information
The flywheel is cast iron and ensures uniform operation of the engine. In addition, the flywheel serves as a support for the clutch. Along the perimeter of the generating surface of the flywheel, a ring gear is installed, into engagement with which the starter drive gear is inserted when the engine is started.
The ring gear is made of steel and hardened by high frequency current. The crown is pressed onto the flywheel body after preheating to a temperature of 180÷200°C.
The friction surface of the flywheel mating with the clutch disc is subjected to very thorough machining.
The flywheel is attached to the crankshaft flange with four M10x1 bolts, which are secured with a special washer common to all four bolts.
All flywheels are statically balanced (admissible unbalance leaves no more than 0.1 Nm). After landing on the crankshaft, the flywheel assembly is dynamically balanced.
During the operation of the car, the rear surface of the flywheel, which interacts with the clutch disc, is subject to wear, as well as its ring gear. Repair of the rear surface of the flywheel consists in its regrinding on a special grinding machine in compliance with the necessary tolerances. As for the crown, if there are signs of significant wear of the teeth or their damage, it must be replaced.
The worn crown is removed from the flywheel using a press. Alternatively, one or more holes with a diameter of 12÷13 mm are drilled in the base of the crown so that the crown cracks. Be careful not to damage the flywheel itself.
A new crown before installation should be heated in an electric furnace to a temperature of 180÷200°C. the hot crown is laid on a flat surface, then the flywheel is pressed into it, which is better to cool first.
When removing the flywheel from the crankshaft, it should be remembered that it is subjected to dynamic balancing, and therefore must be installed strictly in the same position during assembly - apply landing marks.
Removing
1. Remove manual transmission (see chapter Transmission) and clutch assembly (see chapter Clutch).

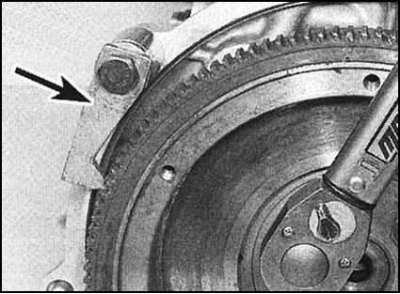
2. Using a latch made of a thick metal plate, wedge the flywheel ring gear, blocking the latter from turning while releasing its fastening bolts. Alternatively, the flywheel can be locked with a metal plate bolted between it and the cylinder block.
3. Turn out bolts of fastening of a flywheel. During assembly, they must be replaced without fail.

4. Mark the position of the flywheel in relation to the end of the crankshaft trunnion to avoid imbalance during assembly.
5. Carefully remove the heavy flywheel.
Examination
1. Check up a condition of a surface of a flywheel interfaced with a disk of coupling. In case of detection of deep scratches, cracks, scuffs and other mechanical damage, the flywheel must be replaced, or must be given to the groove (consult a car service specialist).
2. Carefully inspect the flywheel ring gear. In case of wear or loss of teeth, the crown should be replaced in a car service workshop.
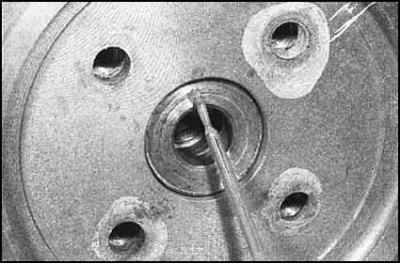
3. Having driven the threaded holes in the end of the crankshaft pin with a tap, remove the remnants of the fixing sealant and corrosion products from them.
Installation
1. After carefully cleaning the mating surfaces, install the flywheel on the crankshaft trunnion in accordance with the landing marks applied during the dismantling process.
Note. The new flywheel can be installed in any position.
2. If the new mounting bolts are not lubricated with a fixing compound at the factory, lightly lubricate their threads with a suitable sealant. Screw in the bolts and tighten them until only by hand.
3. Use one of the methods suggested above to block the flywheel from turning, then tighten the mounting bolts with the required force.
4. Reinstall the clutch assembly and manual transmission (see chapters Clutch and Transmission).
